Chatwoot 是一个开源客户沟通平台,可帮助公司在其网站、Facebook 页面、Twitter、Whatsapp、SMS、电子邮件等上吸引客户。 它是 Intercom、Zendesk、Salesforce Service Cloud 等的开源替代品。
很多网站的右侧或者右下角,都会有一个 联系我们 按钮,除了电话或者微信外,还可以留言或者直接与客服在线聊天,而要实现这些功能,就需要用到我们今天介绍的客户沟通平台 Chatwoot,它为我们提供了从一个地方管理对话、建立关系和取悦客户的所有工具。
docker-compose 安装
新建安装目录
# 新建文件夹 chatwoot 和 子目录
mkdir -p /volume1/docker/chatwoot/{postgres,redis,storage}

# 进入 chatwoot 目录
cd /volume1/docker/chatwoot
env.txt 文件
首选需要 .env 文件,官方的样例文件在:https://raw.githubusercontent.com/chatwoot/chatwoot/develop/.env.example,你可以在本地复制粘贴生成后,上传到 chatwoot 目录,也可以直接用下面的命令下载
# 下载 .env
wget -O .env https://raw.githubusercontent.com/chatwoot/chatwoot/develop/.env.example
#下载 Docker compose
wget -O docker-compose.yaml https://raw.githubusercontent.com/chatwoot/chatwoot/develop/docker-compose.production.yaml
虽然参数很多,但是要跑起来,需要修改的并不多
SECRET_KEY_BASE:可以用命令 openssl rand -base64 32 来生成;
FRONTEND_URL:如果局域网使用可以用 IP:port,例如:http://192.168.0.199:3000,公网使用直接就用域名,例如:https://chatwoot.laosu.ml:444
POSTGRES_PASSWORD:PostgresSQL 数据库的密码,建议密码复杂一点;
将用到的 .env 文件和 docker-compose.yml 放到了下面,方便大家对比着看:
.env
# Used to verify the integrity of signed cookies. so ensure a secure value is set
SECRET_KEY_BASE=

# Replace with the URL you are planning to use for your app
FRONTEND_URL=http://43.139.183.143:8028
# To use a dedicated URL for help center pages
# HELPCENTER_URL=http://0.0.0.0:3000

# If the variable is set, all non-authenticated pages would fallback to the default locale.
# Whenever a new account is created, the default language will be DEFAULT_LOCALE instead of en
# DEFAULT_LOCALE=en

# If you plan to use CDN for your assets, set Asset CDN Host
ASSET_CDN_HOST=

# Force all access to the app over SSL, default is set to false
FORCE_SSL=false

# This lets you control new sign ups on your chatwoot installation
# true : default option, allows sign ups
# false : disables all the end points related to sign ups
# api_only: disables the UI for signup, but you can create sign ups via the account apis
ENABLE_ACCOUNT_SIGNUP=false

# Redis config
REDIS_URL=redis://redis:6379
# If you are using docker-compose, set this variable's value to be any string,
# which will be the password for the redis service running inside the docker-compose
# to make it secure
REDIS_PASSWORD=
# Redis Sentinel can be used by passing list of sentinel host and ports e,g. sentinel_host1:port1,sentinel_host2:port2
REDIS_SENTINELS=
# Redis sentinel master name is required when using sentinel, default value is "mymaster".
# You can find list of master using "SENTINEL masters" command
REDIS_SENTINEL_MASTER_NAME=

# By default Chatwoot will pass REDIS_PASSWORD as the password value for sentinels
# Use the following environment variable to customize passwords for sentinels.
# Use empty string if sentinels are configured with out passwords
# REDIS_SENTINEL_PASSWORD=

# Redis premium breakage in heroku fix
# enable the following configuration
# ref: https://github.com/chatwoot/chatwoot/issues/2420
# REDIS_OPENSSL_VERIFY_MODE=none

# Postgres Database config variables
# You can leave POSTGRES_DATABASE blank. The default name of
# the database in the production environment is chatwoot_production
# POSTGRES_DATABASE=
POSTGRES_HOST=postgres
POSTGRES_USERNAME=postgres
POSTGRES_PASSWORD=xxxxxxx
RAILS_ENV=development
# Changes the Postgres query timeout limit. The default is 14 seconds. Modify only when required.
# POSTGRES_STATEMENT_TIMEOUT=14s
RAILS_MAX_THREADS=5

# The email from which all outgoing emails are sent
# could user either  `email@yourdomain.com` or `BrandName <email@yourdomain.com>`
MAILER_SENDER_EMAIL=kysm <6167555@qq.com>

#SMTP domain key is set up for HELO checking
SMTP_DOMAIN=qq.com
# Set the value to "mailhog" if using docker-compose for development environments,
# Set the value as "localhost" or your SMTP address in other environments
# If SMTP_ADDRESS is empty, Chatwoot would try to use sendmail(postfix)
SMTP_ADDRESS=smtp.qq.com
SMTP_PORT=465
SMTP_USERNAME=6167555@qq.com
SMTP_PASSWORD=xxxxxxx
# plain,login,cram_md5
SMTP_AUTHENTICATION=login
SMTP_ENABLE_STARTTLS_AUTO=true
# Can be: 'none', 'peer', 'client_once', 'fail_if_no_peer_cert', see http://api.rubyonrails.org/classes/ActionMailer/Base.html
SMTP_OPENSSL_VERIFY_MODE=peer
# Comment out the following environment variables if required by your SMTP server
# SMTP_TLS=
# SMTP_SSL=

# Mail Incoming
# This is the domain set for the reply emails when conversation continuity is enabled
MAILER_INBOUND_EMAIL_DOMAIN=
# Set this to the appropriate ingress channel with regards to incoming emails
# Possible values are :
# relay for Exim, Postfix, Qmail
# mailgun for Mailgun
# mandrill for Mandrill
# postmark for Postmark
# sendgrid for Sendgrid
RAILS_INBOUND_EMAIL_SERVICE=
# Use one of the following based on the email ingress service
# Ref: https://edgeguides.rubyonrails.org/action_mailbox_basics.html
# Set this to a password of your choice and use it in the Inbound webhook
RAILS_INBOUND_EMAIL_PASSWORD=

MAILGUN_INGRESS_SIGNING_KEY=
MANDRILL_INGRESS_API_KEY=

# Creating Your Inbound Webhook Instructions for Postmark and Sendgrid:
# Inbound webhook URL format:
#    https://actionmailbox:[YOUR_RAILS_INBOUND_EMAIL_PASSWORD]@[YOUR_CHATWOOT_DOMAIN.COM]/rails/action_mailbox/[RAILS_INBOUND_EMAIL_SERVICE]/inbound_emails
# Note: Replace the values inside the brackets; do not include the brackets themselves.
# Example: https://actionmailbox:mYRandomPassword3@chatwoot.example.com/rails/action_mailbox/postmark/inbound_emails
# For Postmark
# Ensure the 'Include raw email content in JSON payload' checkbox is selected in the inbound webhook section.

# Storage
ACTIVE_STORAGE_SERVICE=local

# Amazon S3
# documentation: https://www.chatwoot.com/docs/configuring-s3-bucket-as-cloud-storage
S3_BUCKET_NAME=
AWS_ACCESS_KEY_ID=
AWS_SECRET_ACCESS_KEY=
AWS_REGION=

# Log settings
# Disable if you want to write logs to a file
RAILS_LOG_TO_STDOUT=true
LOG_LEVEL=info
LOG_SIZE=500
# Configure this environment variable if you want to use lograge instead of rails logger
#LOGRAGE_ENABLED=true

### This environment variables are only required if you are setting up social media channels

# Facebook
# documentation: https://www.chatwoot.com/docs/facebook-setup
FB_VERIFY_TOKEN=
FB_APP_SECRET=
FB_APP_ID=

# https://developers.facebook.com/docs/messenger-platform/instagram/get-started#app-dashboard
IG_VERIFY_TOKEN=

# Twitter
# documentation: https://www.chatwoot.com/docs/twitter-app-setup
TWITTER_APP_ID=
TWITTER_CONSUMER_KEY=
TWITTER_CONSUMER_SECRET=
TWITTER_ENVIRONMENT=

#slack integration
SLACK_CLIENT_ID=
SLACK_CLIENT_SECRET=

# Google OAuth
GOOGLE_OAUTH_CLIENT_ID=
GOOGLE_OAUTH_CLIENT_SECRET=
GOOGLE_OAUTH_CALLBACK_URL=

### Change this env variable only if you are using a custom build mobile app
## Mobile app env variables
IOS_APP_ID=L7YLMN4634.com.chatwoot.app
ANDROID_BUNDLE_ID=com.chatwoot.app

# https://developers.google.com/android/guides/client-auth (use keytool to print the fingerprint in the first section)
ANDROID_SHA256_CERT_FINGERPRINT=AC:73:8E:DE:EB:56:EA:CC:10:87:02:A7:65:37:7B:38:D4:5D:D4:53:F8:3B:FB:D3:C6:28:64:1D:AA:08:1E:D8

### Smart App Banner
# https://developer.apple.com/library/archive/documentation/AppleApplications/Reference/SafariWebContent/PromotingAppswithAppBanners/PromotingAppswithAppBanners.html
# You can find your app-id in https://itunesconnect.apple.com
#IOS_APP_IDENTIFIER=1495796682

## Push Notification
## generate a new key value here : https://d3v.one/vapid-key-generator/
# VAPID_PUBLIC_KEY=
# VAPID_PRIVATE_KEY=
#
# for mobile apps
# FCM_SERVER_KEY=

### APM and Error Monitoring configurations
## Elastic APM
## https://www.elastic.co/guide/en/apm/agent/ruby/current/getting-started-rails.html
# ELASTIC_APM_SERVER_URL=
# ELASTIC_APM_SECRET_TOKEN=

## Sentry
# SENTRY_DSN=

## LogRocket
# LOG_ROCKET_PROJECT_ID=xxxxx/some-project

# MICROSOFT CLARITY
# MS_CLARITY_TOKEN=xxxxxxxxx

# GOOGLE_TAG_MANAGER
# GOOGLE_TAG = GTM-XXXXXXX

## Scout
## https://scoutapm.com/docs/ruby/configuration
# SCOUT_KEY=YOURKEY
# SCOUT_NAME=YOURAPPNAME (Production)
# SCOUT_MONITOR=true

## NewRelic
# https://docs.newrelic.com/docs/agents/ruby-agent/configuration/ruby-agent-configuration/
# NEW_RELIC_LICENSE_KEY=
# Set this to true to allow newrelic apm to send logs.
# This is turned off by default.
# NEW_RELIC_APPLICATION_LOGGING_ENABLED=

## Datadog
## https://github.com/DataDog/dd-trace-rb/blob/master/docs/GettingStarted.md#environment-variables
# DD_TRACE_AGENT_URL=

# MaxMindDB API key to download GeoLite2 City database
# IP_LOOKUP_API_KEY=

## Rack Attack configuration
## To prevent and throttle abusive requests
# ENABLE_RACK_ATTACK=true
# RACK_ATTACK_LIMIT=300
# ENABLE_RACK_ATTACK_WIDGET_API=true

## Running chatwoot as an API only server
## setting this value to true will disable the frontend dashboard endpoints
# CW_API_ONLY_SERVER=false

## Development Only Config
# if you want to use letter_opener for local emails
# LETTER_OPENER=true
# meant to be used in github codespaces
# WEBPACKER_DEV_SERVER_PUBLIC=

# If you want to use official mobile app,
# the notifications would be relayed via a Chatwoot server
ENABLE_PUSH_RELAY_SERVER=true

# Stripe API key
STRIPE_SECRET_KEY=
STRIPE_WEBHOOK_SECRET=

# Set to true if you want to upload files to cloud storage using the signed url
# Make sure to follow https://edgeguides.rubyonrails.org/active_storage_overview.html#cross-origin-resource-sharing-cors-configuration on the cloud storage after setting this to true.
DIRECT_UPLOADS_ENABLED=

#MS OAUTH creds
AZURE_APP_ID=
AZURE_APP_SECRET=

## Advanced configurations
## Change these values to fine tune performance
# control the concurrency setting of sidekiq
# SIDEKIQ_CONCURRENCY=10


# AI powered features
## OpenAI key
# OPENAI_API_KEY=

# Sentiment analysis model file path
SENTIMENT_FILE_PATH=


# Housekeeping/Performance related configurations
# Set to true if you want to remove stale contact inboxes
# contact_inboxes with no conversation older than 90 days will be removed
# REMOVE_STALE_CONTACT_INBOX_JOB_STATUS=false
docker-compose.yml
version: '3'

services:
  base: &base
    image: chatwoot/chatwoot:latest
    env_file: .env ## Change this file for customized env variables
    volumes:
      - /data/storage:/app/storage

  rails:
    <<: *base
    depends_on:
      - postgres
      - redis
    ports:
      - 3000:3000
    environment:
      - NODE_ENV=production
      - RAILS_ENV=production
      - INSTALLATION_ENV=docker
    entrypoint: docker/entrypoints/rails.sh
    command: ['bundle', 'exec', 'rails', 's', '-p', '3000', '-b', '0.0.0.0']

  sidekiq:
    <<: *base
    depends_on:
      - postgres
      - redis
    environment:
      - NODE_ENV=production
      - RAILS_ENV=production
      - INSTALLATION_ENV=docker
    command: ['bundle', 'exec', 'sidekiq', '-C', 'config/sidekiq.yml']

  postgres:
    image: postgres:12
    restart: always
    ports:
      - 5432:5432
    volumes:
      - /data/postgres:/var/lib/postgresql/data
    environment:
      - POSTGRES_DB=chatwoot
      - POSTGRES_USER=postgres
      # Please provide your own password.
      - POSTGRES_PASSWORD=xxxxxxx

  redis:
    image: redis:alpine
    restart: always
    command: ["sh", "-c", "redis-server --requirepass \"$REDIS_PASSWORD\""]
    env_file: .env
    volumes:
      - /data/redis:/data
    ports:
      - 6379:6379
然后执行下面的命令创建数据库
# 通过运行迁移来准备数据库
docker compose run --rm rails bundle exec rails db:chatwoot_prepare
看到 Created database 'chatwoot_production',表示数据库创建成功了,继续执行下面的命令
# 需要先删除数据库容器
docker-compose down

# 一键启动
docker-compose up -d
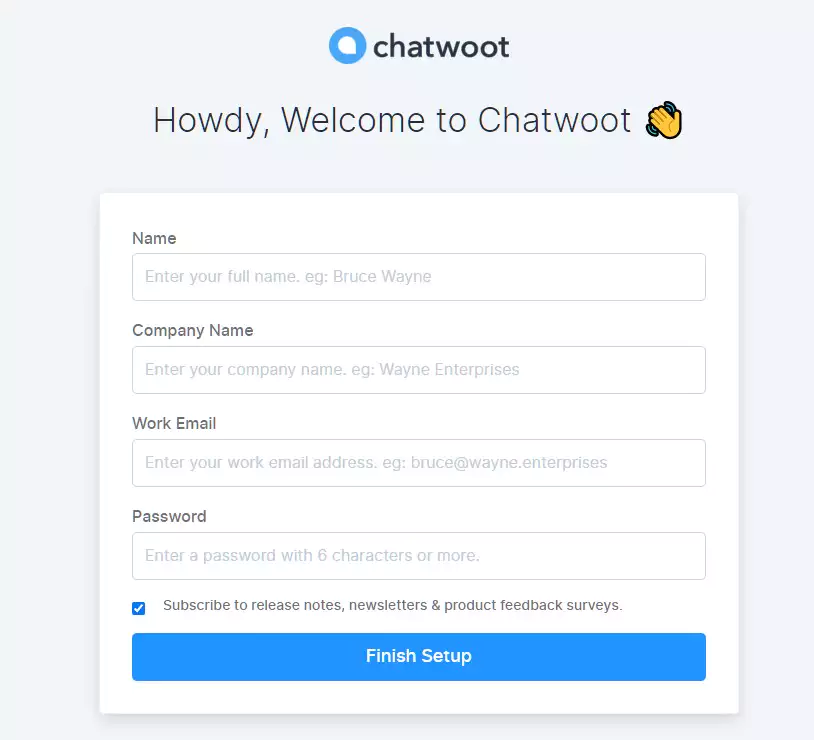
在浏览器中输入 http://43.139.183.143:8028 就能看到注册界面
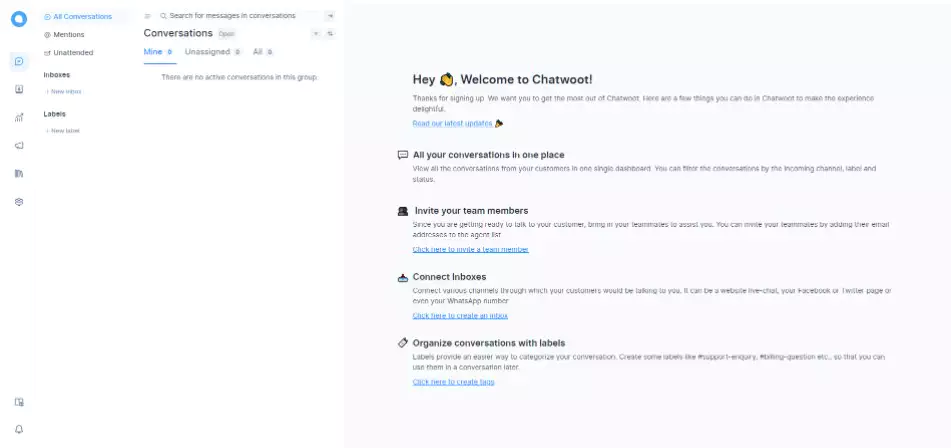
注册成功之后再登录的主界面:
设置中文
Settings --> Account Setting --> Site language,下拉找到简体中文
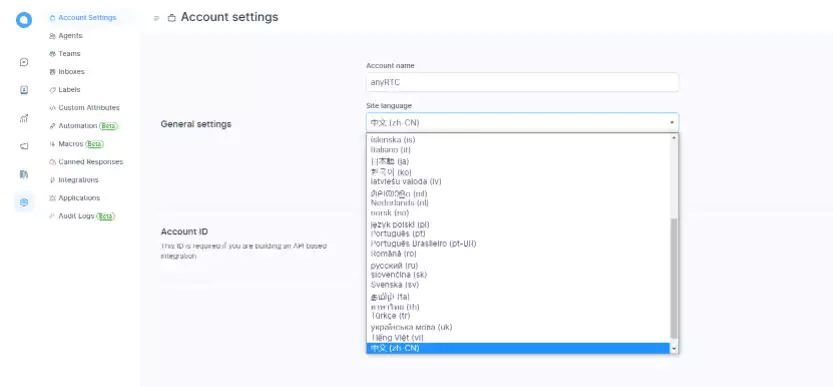
点右上角的绿色按钮 Update settings 保存设置
现在大部分界面已经是中文了
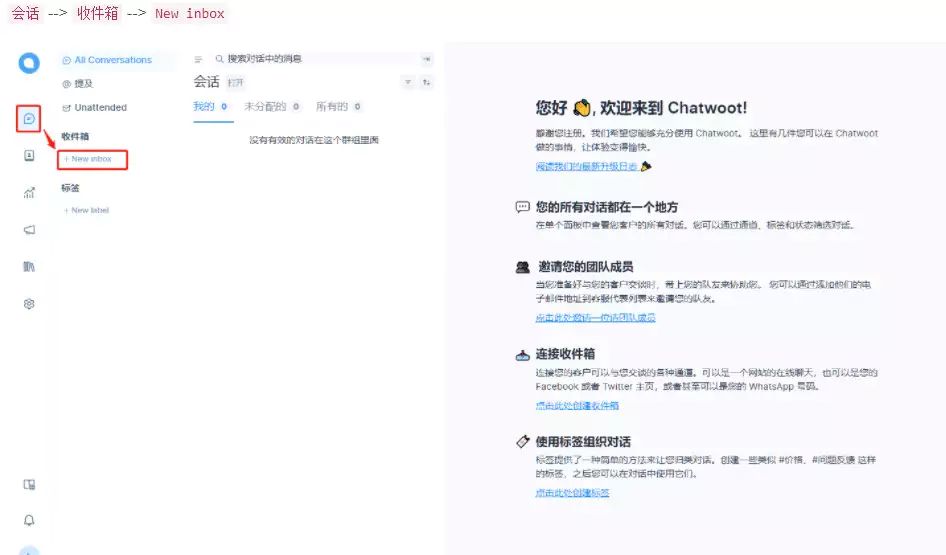
客户服务渠道
会话 --> 收件箱 --> New inbox
选择 Website
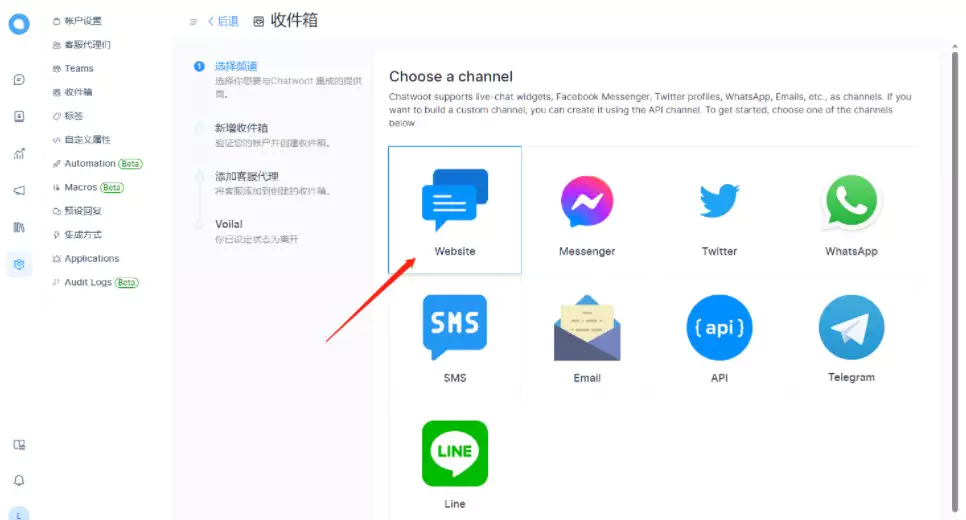
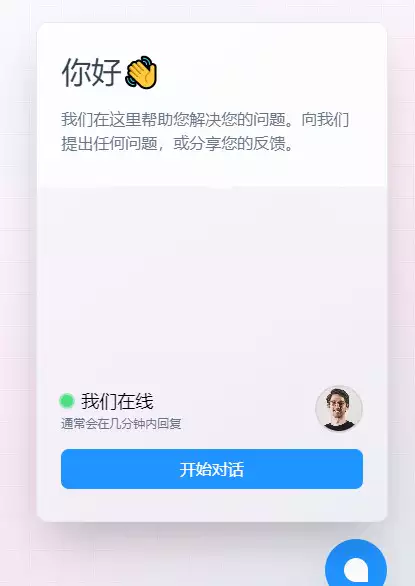
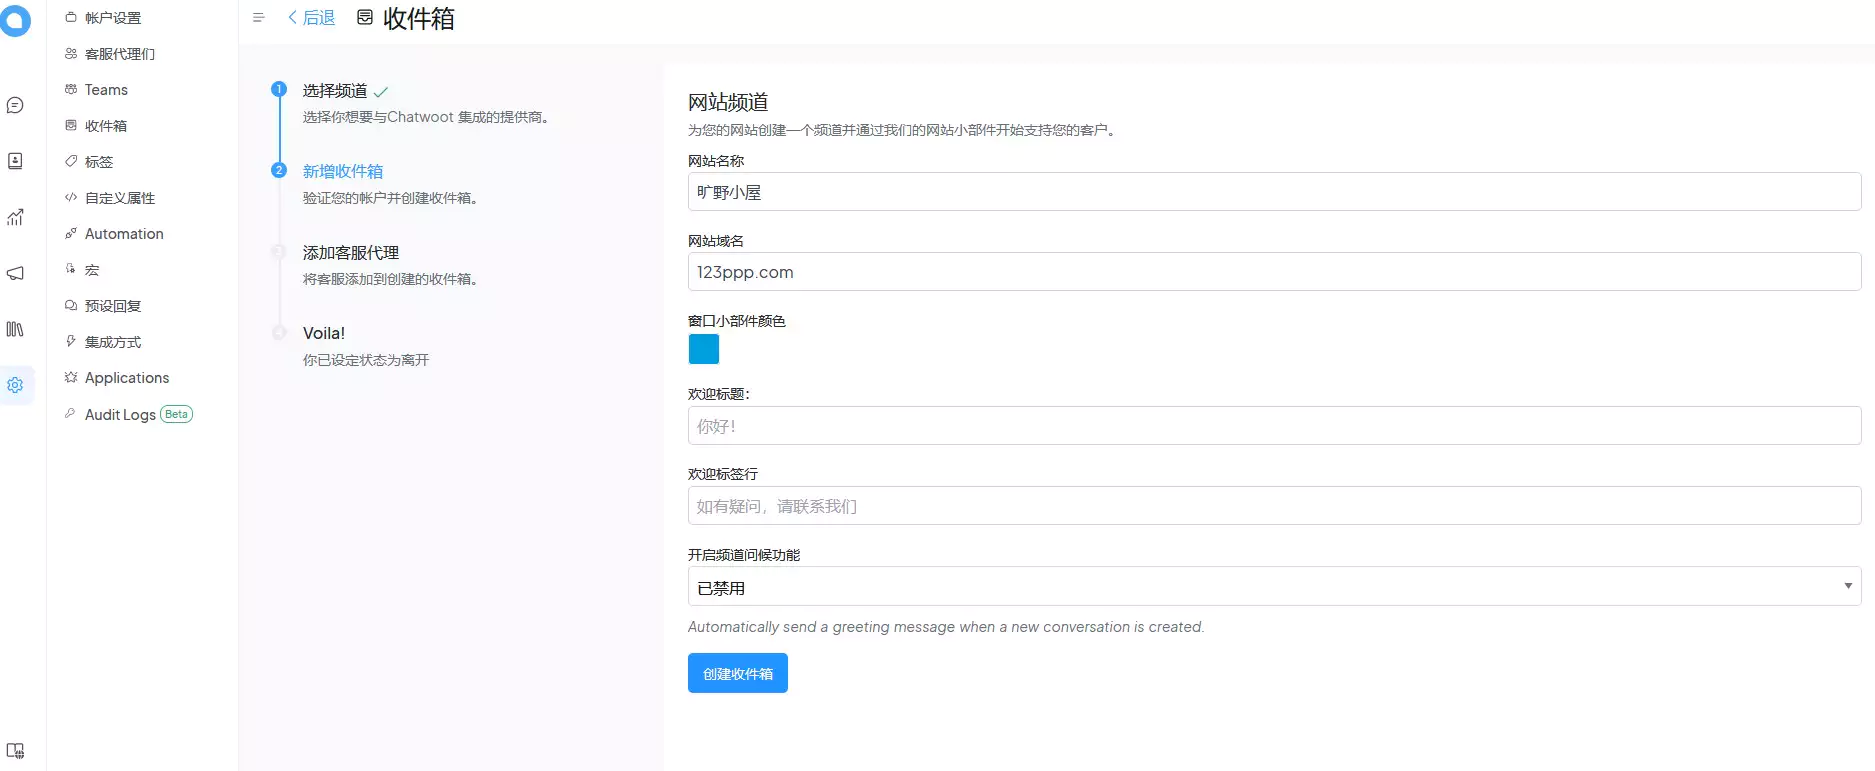
用自己的网站做个测试
现在生成了一段代码
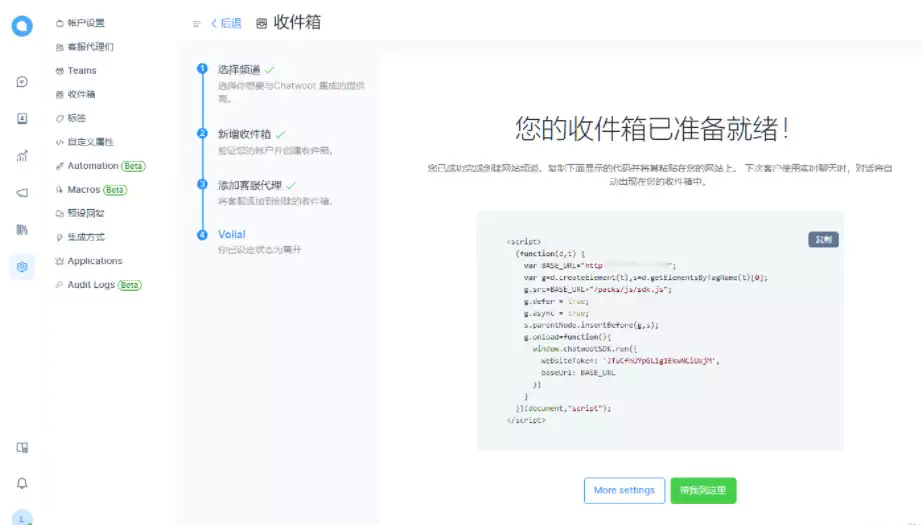
添加代码到网站
将上面这段收件箱脚本,粘贴到网站的页面的
声明:本文为原创文章,版权归旷野小站所有,欢迎分享本文,转载请保留出处!
